

CRAFT Maker Space - Summer Lights workshop at home!
Recreating the Summer Lights summer camp at home is a little more difficult than the Stop Motion Animation camp in that we used materials that are not readily available about the house. But perhaps you have a torch that no longer works, or maybe it does work, but you are happy for your child to take it apart and see how it works? A torch has a basic circuit in it and with a battery, wires and a bulb, there is a lot of learning and understanding gained in order to get the bulb to light up, not to mention the learning that would happen if the bulb doesn’t light! Is it the bulb? Is it the battery? Is it the wires? Is it the circuit? Is there more than one piece not working? Can you work scientifically and methodically to solve the problem? A trip to your local shop might be needed to actually solve the problem if a replacement is needed and to have that moment of satisfaction of making it work. Be inventive! Maybe it’s time to take out those Christmas lights that don’t work?! Showing your child how to problem solve and fix something and persevere with a task, are really great skills for them to develop. It’s a great opportunity to talk about the importance of keeping things in use too which complements acting sustainably and the circular economy.
Of course, there are commercial electronic kits available in toy stores and most of them come with a booklet of challenges varying from easy to hard. These provide hours of engagement, but might need the help of an adult or older sibling in order to get started. You might also need to provide some nice incentives like time in the garden together, or an ice cream, on completion on a certain amount of the challenges. You can use the kit as a basis for your own project too. We added motors and LEDs to paper cups and geometric shapes like cubes, pyramids and cylinders made from paper, and made a switch to turn them off and on using a metal paperclip.
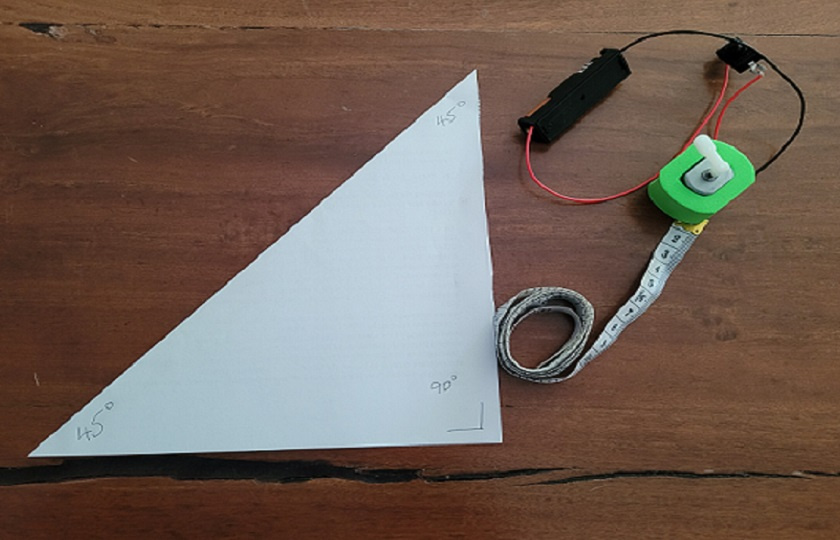
Talking about lights, after lunch one day, we had a look outside at what lights were around our building and took some time to measure the height of the very tall light post outside our building. It was truly fascinating to hear what the children’s guesses were and their understanding of a meter! If you know the length of one thing like you or your child’s height, or your “giant step” or arm length, whatever it is, you can give a decent estimate to the height of something high. We had the added use of a clinometer to identify when we were standing at a spot where the top of the light post was at a 45-degree angle from our eyes (I can almost hear you rolling your eyes and thinking Pythagoras! 😁). Well, yes, the property of a right-angled triangle (the angle between the post and your eyes when you look straight ahead) when the two other angles are 45 degrees (isoseles triangle), means that the length of the height from the point where your eyes meet the post when you look straight on to the top of the post, and the distance from you to the post are the same. So just measuring or estimating the distance from yourself to the post, and adding it on your height, gives you the height of the post. The tan (opposite over adjacent) of 45 degrees is 1 - ringing any bells?
A neat way to do this instead of using a clinometer, is to fold a square shape of paper in two across the diagonal. Holding the page so that one of the 45-degree angles is close to your eye and the other is pointed to the top of the light post (move around!), while holding it so the bottom of it is parallel to the ground, will do the same job for you. The post height is your height to your eyes, plus the distance you are to the pole. Neat, eh?
Have fun with lights and circuits, but caution, caution, caution – please ensure that any circuit is switched off or taken apart when you are finished.